- +86 13837949030 +86 15890619536
- info@lymcbearings.com export@lymcbearings.com
- Luoxin Industrial Cluster, Luoyang City,Henan Province,China
Time:2025-08-25 02:31:16 Source:LYMC Slewing Bearing
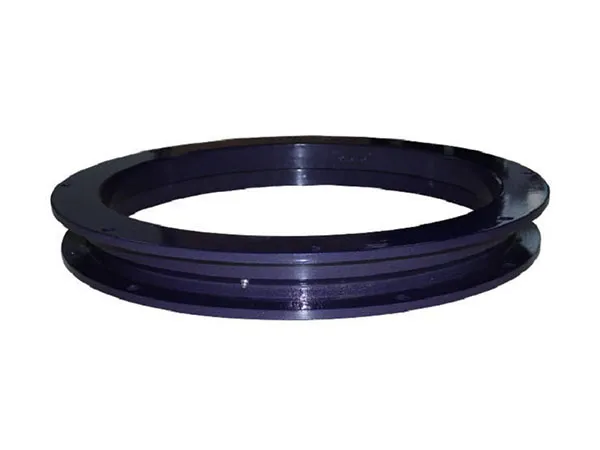
Replacing a trailer turntable bearing is a precise job that requires the proper tools and a safe working environment. The process is a bit more involved than replacing a standard wheel bearing because the turntable bearing is a large, flat slewing ring bolted to both the trailer's A-frame and its chassis.

Safety First
Secure the Trailer: Before you begin, you must ensure the trailer is stable. Use a jack to lift the trailer and then place it on jack stands to prevent it from moving or falling.
Prevent Movement: Block the wheels to ensure the trailer cannot roll in either direction.
Symptoms of a Failing Turntable Bearing:
Before you start, confirm the bearing needs replacement. Common signs include:
Grinding or Popping Noises: Especially when turning the trailer (e.g., in a yard).
Excessive Play or Sloppiness: If you can rock the front of the trailer side-to-side more than a tiny amount, the bearing is worn.
Binding or Stiff Turning: The turntable feels "notchy" or is difficult to rotate.
Metal Shavings: Finding metal flakes around the turntable seals is a sure sign of internal failure.
Uneven Wear on Tires: A failing turntable can affect alignment and tire wear on the dolly or tractor.
Tools and Parts Needed:
Heavy Equipment:
Overhead crane, heavy-duty forklift with lifting rig, or multiple high-capacity (20+ ton) hydraulic jacks and certified heavy-duty support stands.
Impact wrench (1" drive is recommended for stubborn bolts).
Large torque wrench capable of reaching 500+ ft-lbs (check manufacturer specs).
Hand Tools & Supplies:
Complete socket and wrench set (large sizes).
Long breaker bars and pry bars.
Wire brush (for cleaning mounting surfaces).
Scraper or gasket remover.
High-pressure grease gun.
Shop rags and degreaser.
Parts:
New Turntable Bearing: Ensure it is the correct model, diameter, and bolt pattern for your trailer/dolly.
New Mounting Bolts, Nuts, and Washers: THIS IS NOT OPTIONAL. Always use new, high-tensile (Grade 8 or 10.9) bolts and nuts. Re-using old, stretched bolts is a major safety risk.
High-Quality Chassis Grease: EP (Extreme Pressure) grease is recommended.
Anti-seize compound (optional, but recommended for bolt threads).

Step 1: Prepare the Work Area
Park the tractor-trailer or trailer-dolly combination on a hard, level, and solid surface like a concrete workshop floor.
Chock the wheels of the trailer and tractor/dolly securely.
Disconnect all air and electrical lines between the tractor/dolly and the trailer.
Step 2: Separate and Position the Trailer
Unhitch the trailer from the fifth wheel.
Lower the trailer's landing gear onto solid ground or blocks.
Pull the tractor or dolly forward to provide ample working space around the turntable.
Step 3: Securely Lift and Support the Trailer
This is the most critical safety step.
Position your lifting equipment (crane slings, forklift rig) under the trailer's main frame rails just behind the turntable assembly.
Slowly lift the front of the trailer until its weight is off the turntable and there is about 1-2 inches of clearance.
IMMEDIATELY place heavy-duty support stands under the trailer's main frame. Ensure they are stable and rated for the load.
Lower the trailer so its weight rests securely on the stands. The lifting equipment can now serve as a secondary backup.
Step 4: Unbolt the Top Plate (from the Trailer Chassis)
Using your impact wrench or breaker bar, loosen and remove all the bolts securing the top ring of the turntable to the trailer's chassis.
These bolts can be extremely tight and may be rusted. Penetrating oil can help.
Keep track of any shims or mounting plates; they may need to be reused.
Step 5: Remove the Old Turntable
The turntable is now only attached to the dolly or truck chassis.
If you did not have enough clearance, use your primary lifting device to raise the trailer a few more inches.
The old turntable is very heavy (150-400 lbs / 70-180 kg). Use two people or a small engine hoist to slide it out from under the trailer.
Step 6: Unbolt the Old Turntable from the Chassis
With the turntable on the ground or a workbench, remove the bolts securing the bottom ring.
This is easier than doing it under the trailer.
Step 7: Clean and Inspect Mounting Surfaces
Thoroughly clean both mounting surfaces—the one on the trailer chassis and the one on the dolly/truck chassis.
Use a wire brush and scraper to remove all rust, dirt, old grease, and debris.
Inspect the surfaces for flatness and damage. A warped or cracked mounting plate will cause the new bearing to fail prematurely. Repair any damage before proceeding.
Step 8: Position and Bolt the New Turntable
Check the new turntable for any orientation markings (e.g., "FRONT" or an arrow). Some have specific grease nipple placements.
Lift the new turntable into position on the dolly/truck chassis.
Apply anti-seize to the threads of your new bolts.
Insert the bolts and hand-tighten them to ensure proper alignment.
Tighten the bolts in a star or crisscross pattern to ensure even clamping pressure.
Using your torque wrench, torque all bolts to the manufacturer's specification in the same star pattern. This is a critical step for safety and longevity.
Step 9: Lower the Trailer and Bolt the Top Plate
Carefully lower the trailer until it rests on the top plate of the new turntable.
Adjust the trailer's position as needed to align the bolt holes. A long tapered punch (drift pin) is very useful for this.
Insert the new top plate bolts and hand-tighten them.
Once all bolts are in, tighten them in a star pattern with the impact wrench.
Finish by torquing all bolts to the manufacturer's specification.
Step 10: Grease the New Turntable
Using a high-pressure grease gun, pump fresh EP grease into all grease fittings (zerks) on the turntable.
Continue pumping until you see fresh grease purging evenly from the seal all the way around the bearing. This ensures it's full and any contaminants from shipping are flushed out.
Step 11: Final Assembly and Testing
Remove the support stands and lower the trailer completely.
Reconnect the air and electrical lines.
Hook up the tractor and perform a "tug test" to ensure the fifth wheel is locked.
Release the brakes and drive the unit slowly, making several full-lock turns in each direction. Listen for any unusual noises and feel for any binding.

Re-Torque After Initial Use:
After the first 50-100 miles (80-160 km) of service, you must re-check the torque on all turntable mounting bolts. They can settle into place, and this final check is crucial for long-term safety.
Replacing a trailer turntable bearing (also known as a slew ring or ball race turntable) is a heavy-duty job that requires proper equipment, a focus on safety, and mechanical precision.